
A practical beginner’s guide to ‘how to clean makeup brushes and sponges,’ covering the right cleaning methods, how often to wash them, what to use for stubborn buildup, and how to dry and store them properly.
You already know your makeup tools need regular cleaning, but they’re still easy to overlook. Every time you use a brush or sponge, it picks up traces of makeup, skin oils, dirt, and other residue.
As they repeatedly touch your face, keeping them clean is an important part of good makeup hygiene. Dirty makeup tools can transfer built-up residue back onto your skin and affect how makeup applies, while improper cleaning can shorten the life of your tools.
But the important questions are: what should you use to clean them, how often should you wash them, and how can you dry them without damaging the bristles or sponge?
As a science-backed beauty blogger, I reviewed cosmetic science guidance, research, and expert recommendations to understand which cleaning methods effectively remove stubborn makeup without unnecessarily damaging brush fibers, adhesives, or sponge material.
In this guide, you’ll learn how to clean makeup brushes and sponges properly, including what to use, how often to clean them, how to remove stubborn residue, how to dry them safely, and which mistakes to avoid.
- Why Should You Clean Your Makeup Brushes and Sponges?
- Makeup Brush Anatomy: What You Need to Know Before Washing
- What Can You Use to Clean Makeup Brushes?
- How to Clean Makeup Brushes at Home
- How to Dry Makeup Brushes After Washing
- How to Clean Makeup Sponges and Beauty Blenders
- How Often Should You Wash Makeup Brushes and Sponges?
- What Should You Avoid When Cleaning Makeup Brushes and Sponges
- Beginner Makeup Brush & Sponge Cleaning Checklist
- Key Takeaway
- FAQs
- Continue Reading
- Explore Our Categories
Why Should You Clean Your Makeup Brushes and Sponges?
We’re usually careful about keeping our skin clean and well-prepped before makeup. But your makeup tools also need regular cleaning. Here’s why keeping them clean matters:
1. Makeup and product buildup
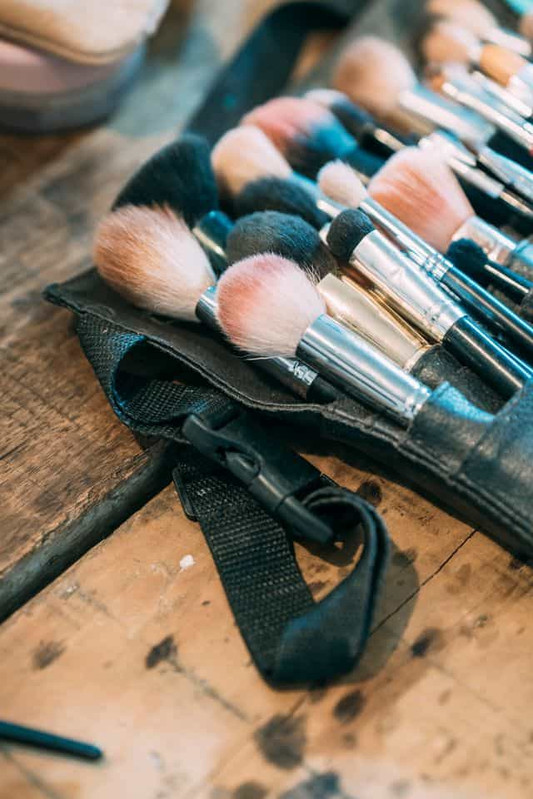
Your makeup brushes and sponges gather makeup products like foundation, concealer, cream blush, liquid makeup, powder, and other products between brush bristles or inside a makeup sponge.
Over time, this buildup can make your tools feel coated, stiff, and harder to rinse properly. Regular washing helps remove it before it accumulates.
2. Oil, dirt, and skin debris
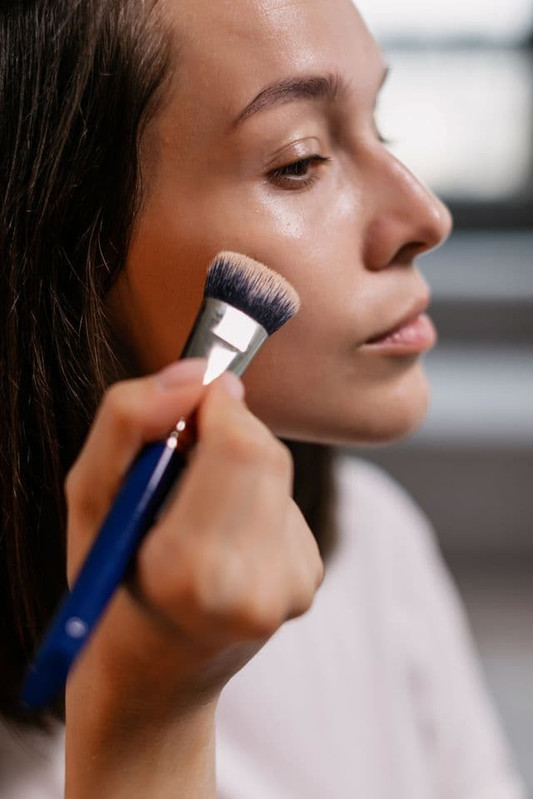
Every application can leave brushes and sponges with traces of skin oil, dirt, dead skin cells, and other residue. When you use the same tool again, some of that buildup can transfer back onto your skin with your makeup.
3. Makeup tools can harbor microorganisms
Used cosmetic products and applicators can become contaminated with microorganisms over time. One study found bacterial contamination in 79–90% of the used cosmetic products tested, with particularly high bacterial loads found in beauty blenders.
More recent research examining cosmetic brushes also found bacterial contamination across the brushes tested.
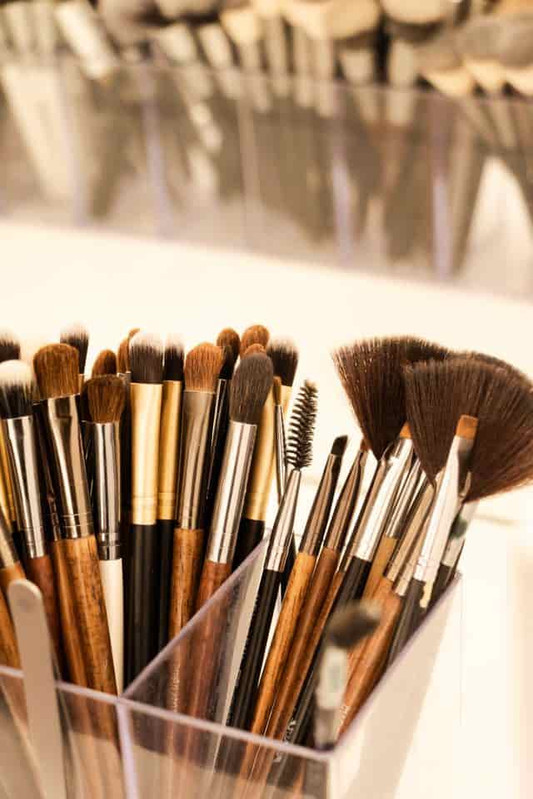
You don’t need to panic if your brush has a little leftover product on it. Regular cleaning is about preventing unnecessary buildup and maintaining good hygiene, not making your makeup tools completely sterile.
Makeup Brush Anatomy: What You Need to Know Before Washing
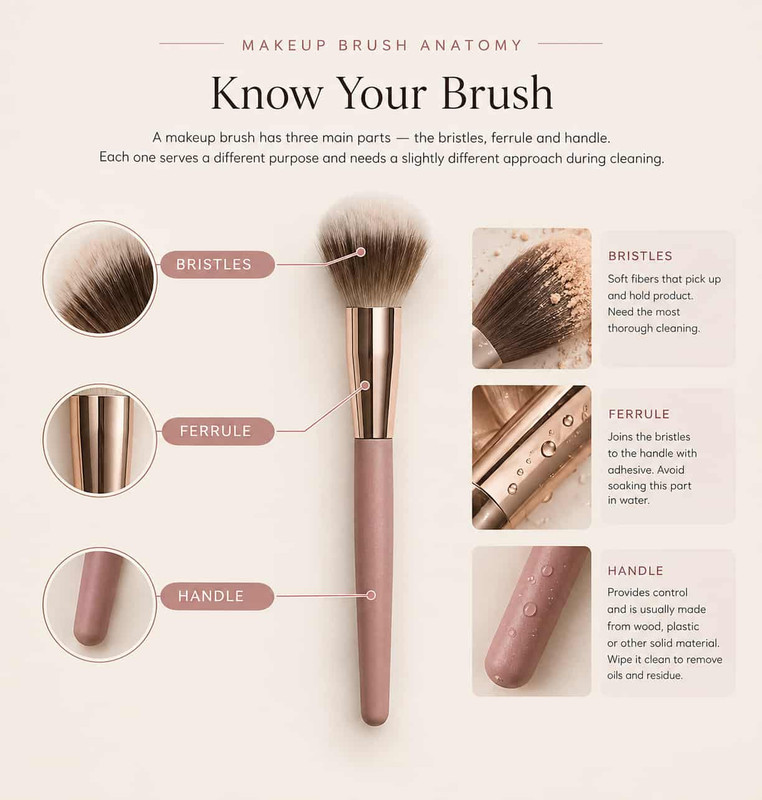
A makeup brush has three main parts: the bristles, ferrule, and handle. Each one serves a different purpose and requires a slightly different approach during cleaning. Understanding the brush’s structure helps you clean it without damaging it.
Bristles: The bristles are the soft fibers at the top of the brush. This is where most of the product buildup occurs, so the bristles need the most thorough cleaning.
Ferrule: The middle section joins the bristles to the handle. The bristles are secured inside it with adhesive, so repeatedly soaking or flooding the ferrule with water can weaken the bond and eventually contribute to shedding or loosening.
Handle: The part you hold while applying makeup. It provides control and is usually made from wood, plastic, or another solid material. Although it collects less makeup than the bristles, it can still pick up oils and residue from your hands, so it should be wiped clean.
Natural vs Synthetic Makeup Brushes
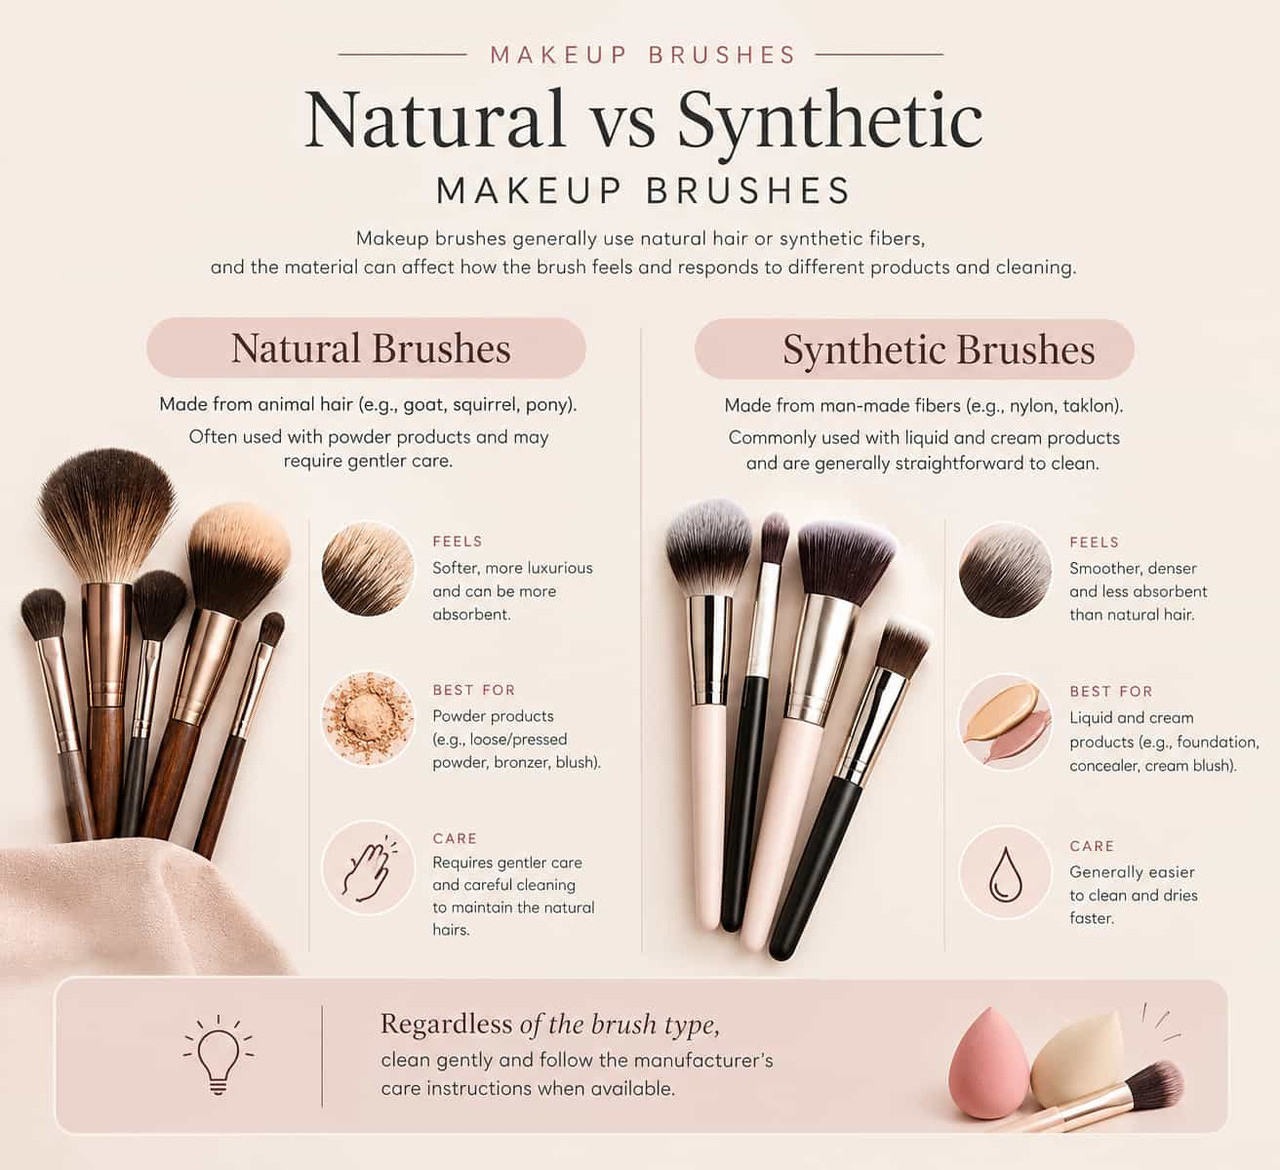
Makeup brushes generally use natural hair or synthetic fibers, and the material can affect how the brush feels and responds to different products and cleaning.
– Natural brushes: Often used with powder products and may require gentler care.
– Synthetic brushes: Commonly used with liquid and cream products and are generally straightforward to clean.
Regardless of the brush type, clean gently and follow the manufacturer’s care instructions when available.
What Can You Use to Clean Makeup Brushes?
You don’t need a dedicated brush cleanser for a basic at-home wash. The important thing is choosing a mild cleanser that can break down makeup and residue without being unnecessarily harsh on the bristles.
| Cleanser | Best For |
|---|---|
| Gentle shampoo | A simple everyday option for regular brush washing |
| Baby shampoo | A mild, convenient alternative for routine cleaning |
| Mild soap | Works well when the formula isn’t overly harsh or drying |
| Dedicated brush cleanser | Convenient if you prefer a product made specifically for makeup brushes |
| Dish soap | Useful for removing heavy or greasy makeup buildup, especially from synthetic brushes |
If you don’t have any of these on hand, face wash or micellar water may help with some surface residue, but plain water alone won’t remove makeup and oily buildup effectively.
How to Clean Makeup Brushes at Home
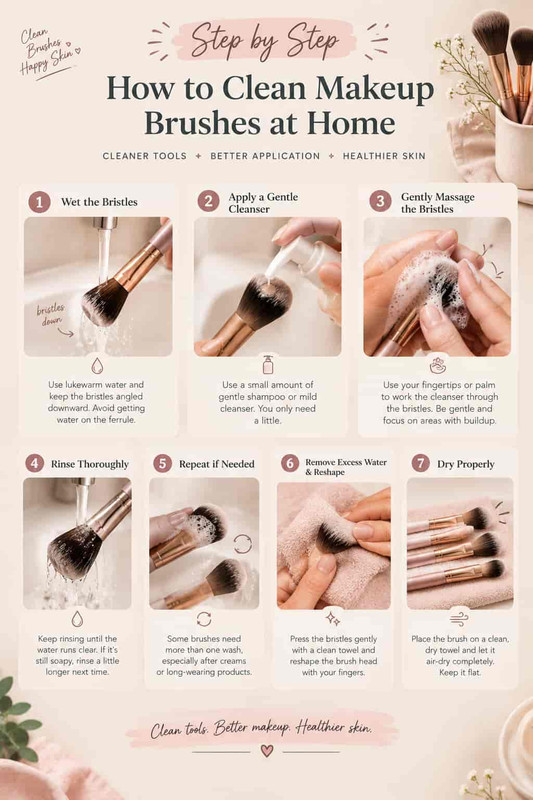
Simply rinsing a brush isn’t enough to remove the makeup and residue trapped within the bristles. You need to loosen that buildup, rinse it away thoroughly, and clean the brush without putting unnecessary stress on the bristles or ferrule.
Step 1 — Wet the Bristles
Run lukewarm water over the brush head, keeping the bristles angled downward as you rinse. Focus the water on the fibers rather than letting it collect around the ferrule.
Step 2 — Apply a Cleanser
Once the bristles are wet, work a small amount of gentle shampoo or mild cleanser into them. You only need enough product to break down the makeup and help lift it from the fibers.
Step 3 — Gently Massage the Bristles
Use your fingertips or the palm of your hand to work the cleanser through the brush. Move gently through the bristles, paying extra attention to areas where makeup has accumulated.
Step 4 — Rinse Thoroughly
Hold the brush under lukewarm water and continue rinsing until the water coming from the bristles is clear.
If you’re struggling to rinse the cleanser out, start with less product next time. Using more cleanser than necessary can make the rinsing process longer without making the brush cleaner.
Step 5 — Repeat if Needed
Some brushes need more than one wash, especially after using foundation, concealer, cream blush, or other long-wearing products.
If the bristles still feel coated or the rinse water isn’t clear, repeat the cleansing step rather than scrubbing harder.
Step 6 — Remove Excess Water & Reshape
Once the brush is clean, press the bristles gently between your fingers or a clean towel to remove excess moisture. Use your fingers to put the brush head back into its original shape.
Step 7 — Dry Properly
Place the reshaped brush on a clean, dry towel and allow it to air-dry completely.
How to Clean Makeup Brushes With Stubborn or Waterproof Makeup
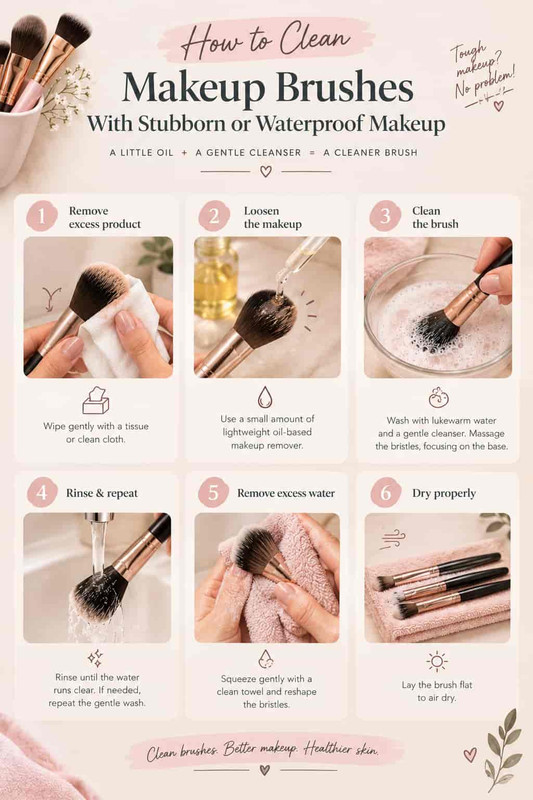
Stubborn makeup may not come off with regular soap and water. A small amount of a lightweight oil can help loosen waterproof, long-wear, cream, and waxy products before you wash the brush.
- Remove excess product: Wipe the brush gently with a tissue or clean cloth to remove as much makeup as possible without pulling on the bristles.
- Loosen the makeup: Apply a small amount of a lightweight oil-based makeup remover to the bristles, especially when cleaning waterproof or long-wearing products. Use only a small amount of the remover; that’s enough to loosen the stubborn product rather than saturating the brush.
- Clean the brush: Follow with lukewarm water and your chosen gentle brush cleanser or mild shampoo. Work the cleanser through the bristles until the loosened makeup is removed. Massage the bristles gently, focusing on the base for foundation and cream-product brushes, where makeup often builds up.
- Rinse and repeat: Rinse until the water runs clear and the brush no longer feels oily or coated. If residue remains, repeat the gentle cleansing step instead of scrubbing harder.
- Dry properly: Squeeze out excess water with a clean towel, reshape the bristles, and lay the brush flat to dry.
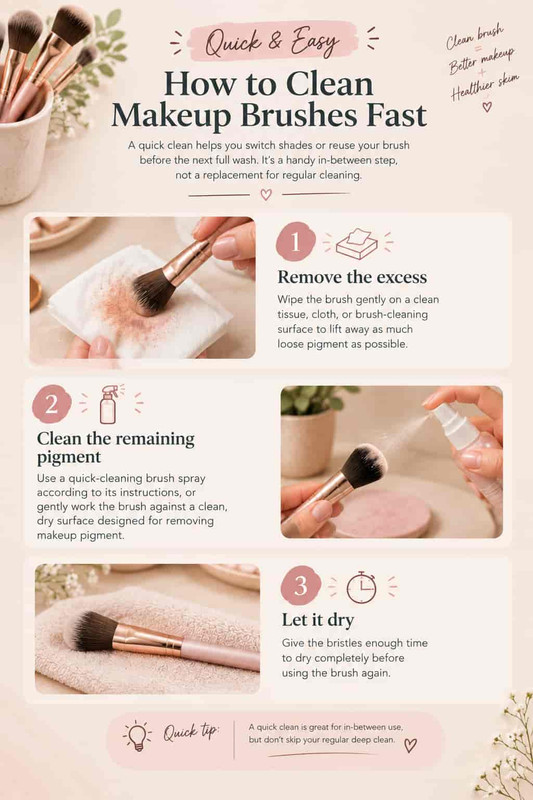
How to Clean Makeup Brushes Fast
Sometimes you need a clean brush to switch eyeshadow shades or reuse one before your next full wash. A quick clean can help in these moments, but it is maintenance between washes—not a replacement for regular cleaning.
- Remove the excess: Wipe the brush gently on a clean tissue, cloth, or brush-cleaning surface to lift away as much loose pigment as possible.
- Clean the remaining pigment: Use a suitable quick-cleaning brush spray according to its instructions, or gently work the brush against a clean, dry surface designed for removing makeup pigment.
- Let it dry: Give the bristles enough time to dry completely before using the brush again.
This works especially well for powder and eyeshadow brushes when you’re switching shades between applications.
How to Sanitize Makeup Brushes
Washing your makeup brushes removes makeup, oil, dirt, and other physical residue. Sanitizing goes a step further by reducing microorganisms on the brush, but it isn’t something you necessarily need to do after every use.
Do You Need Rubbing Alcohol to Sanitize Makeup Brushes?
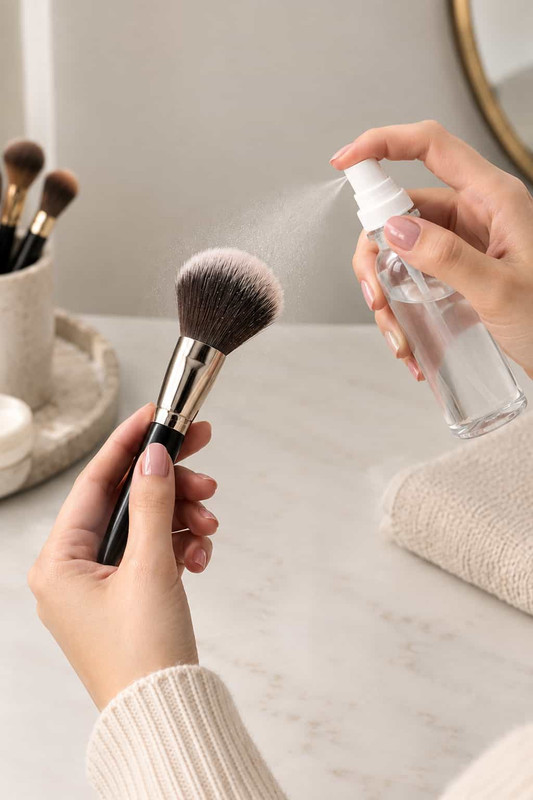
A study testing reusable makeup brushes and sponges found that 70% ethanol eliminated bacterial growth under the study conditions. However, that doesn’t mean you need to spray alcohol on your brushes after every use.
If you choose to use an alcohol-based disinfectant, use a product appropriate for the tool and follow its instructions rather than assuming that stronger alcohol is better.
For most beginners, thorough washing is enough for regular brush hygiene. Alcohol is an optional extra—not a must-have in your brush-cleaning routine.
Now let’s look at how to dry makeup brushes properly and the common mistakes that can shorten their lifespan.
How to Dry Makeup Brushes After Washing
Drying your brushes the right way is equally important as washing them. Washing removes makeup and residue, but the right drying method helps protect the bristles, ferrule, and adhesive while allowing the brush to dry completely.
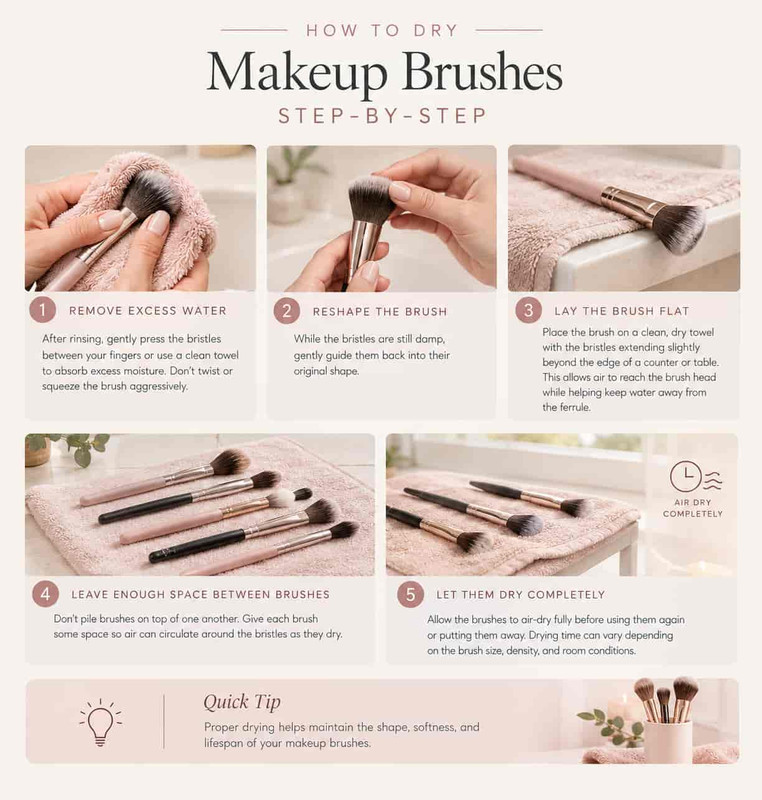
How to Dry Makeup Brushes: Step-by-Step
- Remove excess water: After rinsing, gently press the bristles between your fingers or use a clean towel to absorb excess moisture. Don’t twist or squeeze the brush aggressively.
- Reshape the brush: While the bristles are still damp, gently guide them back into their original shape.
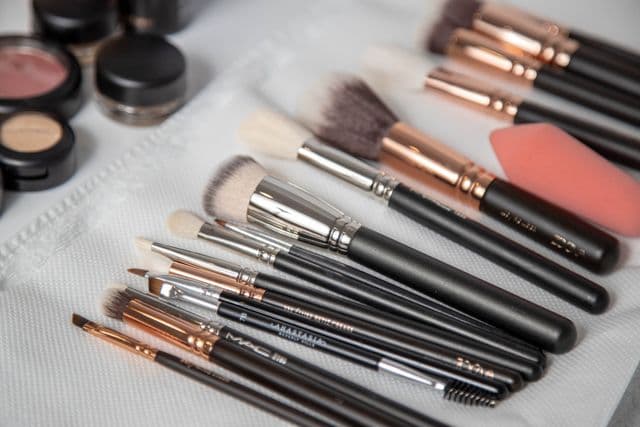
- Lay the brush flat: Place the brush on a clean, dry towel with the bristles extending slightly beyond the edge of a counter or table. This allows air to reach the brush head while helping keep water away from the ferrule.
- Leave enough space between brushes: Don’t pile brushes on top of one another. Give each brush some space so air can circulate around the bristles as they dry.
- Let them dry completely: Allow the brushes to air-dry fully before using them again or putting them away. Drying time can vary depending on the brush size, density, and room conditions.
How to Dry Makeup Brushes Quickly
A freshly washed brush needs time to dry, so there isn’t really a safe instant-dry shortcut. If you need to speed things up, avoid directing high heat from a hair dryer onto the bristles, as excessive heat can affect both the fibers and the adhesive holding the brush together.
Instead, Do This:
- Press out excess moisture gently with your fingers or a clean towel.
- Put the bristles back into shape while they are still damp.
- Leave the brush on a clean, dry towel.
- Keep brushes spaced apart so air can move around them.
- Wait until each brush is fully dry before putting it away or using it again.
Should You Dry Makeup Brushes Upright or Flat?
Flat is the safer option for freshly washed brushes. Place them on a clean towel with the bristle end slightly beyond the edge of the counter or table. This position allows the brush to dry while reducing the chance of water travelling back toward the ferrule.
How to Store Makeup Brushes Properly after Drying
Only store your brushes after they are completely dry. Putting damp brushes into a closed makeup bag, drawer, or container can trap moisture around the bristles.
Once dry, keep them in a clean, dry brush holder or makeup container where the bristles won’t be crushed or constantly exposed to dust.
How to Clean Makeup Sponges and Beauty Blenders
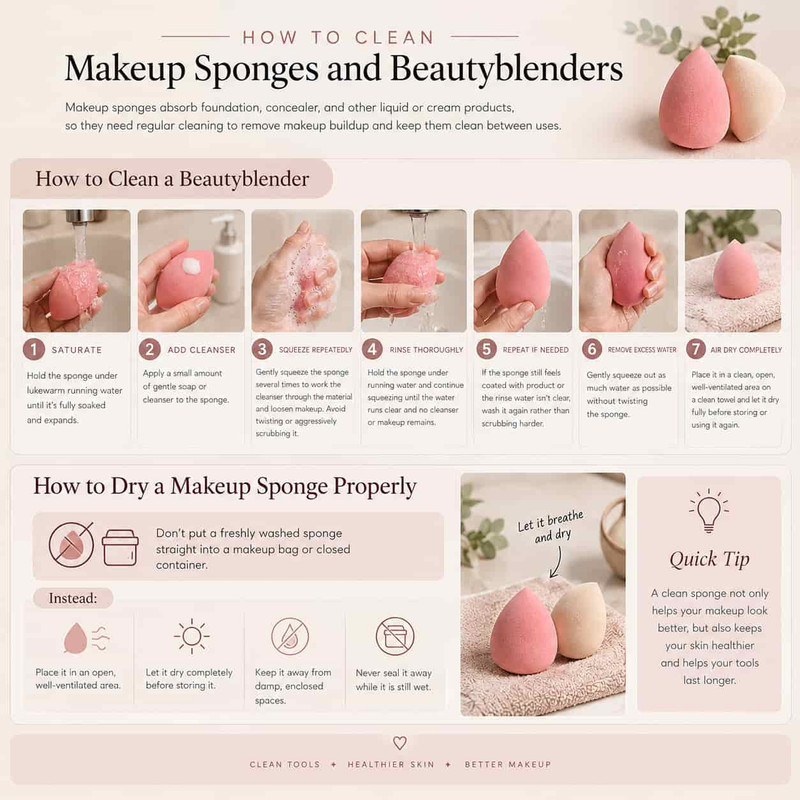
Makeup sponges absorb foundation, concealer, and other liquid or cream products, so they need regular cleaning to remove makeup buildup and keep them clean between uses.
How to Clean a Beauty Blender
- Saturate the sponge completely: Hold it under lukewarm running water until it is fully soaked and expands.
- Add cleanser: Apply a small amount of gentle soap or cleanser to the sponge.
- Squeeze repeatedly: Gently squeeze the sponge several times to work the cleanser through the material and loosen makeup. Avoid twisting or aggressively scrubbing it.
- Rinse thoroughly: Hold the sponge under running water and continue squeezing until the water runs clear and no cleanser or makeup remains.
- Repeat if needed: If the sponge still feels coated with product or the rinse water isn’t clear, wash it again rather than scrubbing harder.
- Remove excess water: Gently squeeze out as much water as possible without twisting the sponge.
- Air dry it completely: Place it in a clean, open, well-ventilated area on a clean towel and let it dry fully before storing or using it again.
What Can You Use to Clean a Makeup Sponge?
You don’t need a special sponge cleaner. A gentle cleanser or mild soap can remove makeup, oil, and residue effectively. The important part is using enough water to rinse the sponge thoroughly and avoiding harsh products that may damage the material.
How Often Should You Wash a Beauty Blender?
Ideally, after every use. Because makeup sponges absorb product and are often used damp, cleaning them after each use helps prevent makeup residue and buildup from sitting in the sponge. If daily cleaning isn’t practical, clean it as soon as possible after use rather than letting makeup dry inside.
How to Dry a Makeup Sponge Properly
Don’t put a freshly washed sponge straight into a makeup bag or closed container. Instead, do this:
- Place it in an open, well-ventilated area.
- Let it dry completely before storing it.
- Keep it away from damp, enclosed spaces.
- Never seal it away while it is still wet.
How Often Should You Wash Makeup Brushes and Sponges?
Different makeup tools need different cleaning schedules depending on the products you use with them. Here’s a simple guide to help you know when to wash each one.
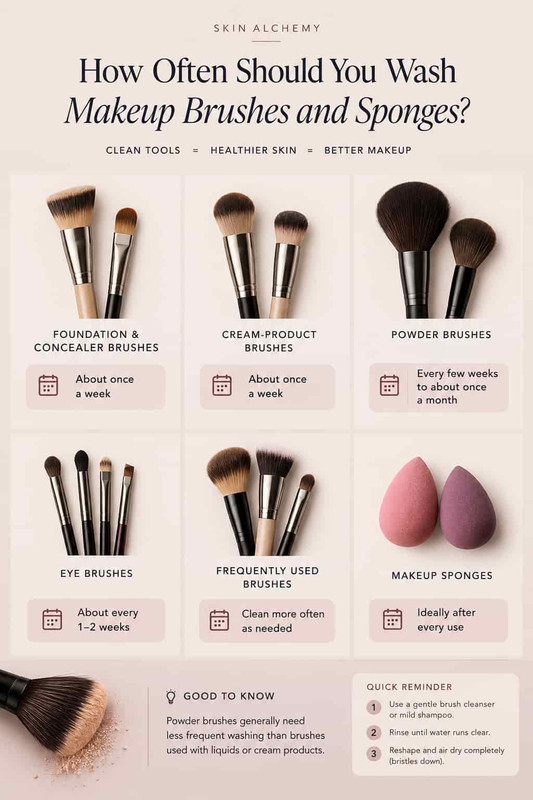
Powder brushes generally need less frequent washing than brushes used with liquid or cream products. About once a month can be a reasonable starting point for a lightly used powder brush, while more frequent use may call for more frequent cleaning.
However, these are practical starting points based on dermatology and clinical guidance, not universal rules.
What Should You Avoid When Cleaning Makeup Brushes and Sponges
Avoid these common mistakes to keep your brushes and sponges clean without damaging them.
- Don’t use very hot water — Very hot water can be harsh on delicate bristles and may affect the brush’s construction. Instead, use lukewarm water.
- Don’t scrub aggressively — rough handling can damage the bristles. Gently massage the bristles or squeeze the sponge instead of pulling, twisting, or scrubbing too hard.
- Don’t soak the entire brush — keep water away from the ferrule and handle.
- Don’t dry brushes upright — water can travel toward the ferrule and weaken the adhesive.
- Don’t use high heat to speed up drying — it can damage the fibers and adhesive.
- Don’t store brushes or sponges while damp — let them dry completely first.
- Don’t seal a damp sponge in a closed container — give it plenty of airflow while drying.
- Don’t rely on quick cleaning alone — use a proper wash when your tools have visible buildup.
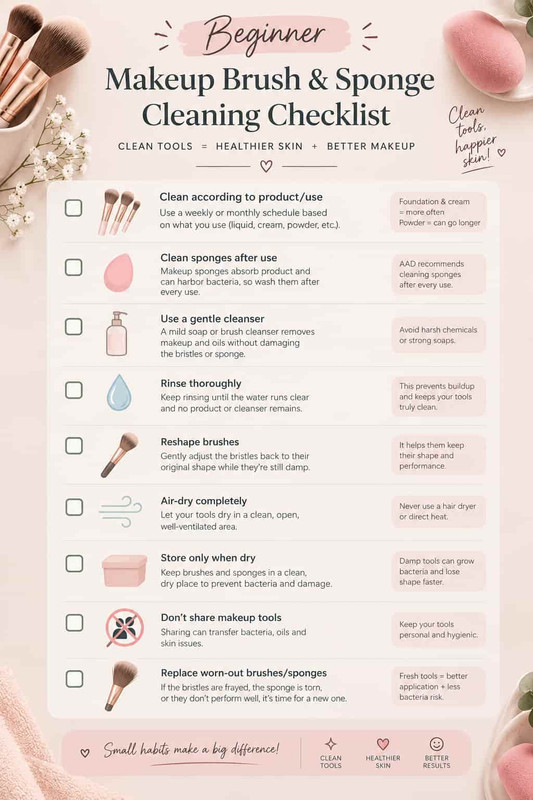
Beginner Makeup Brush & Sponge Cleaning Checklist
Key Takeaway
Cleaning makeup tools regularly should be an important part of your makeup routine, especially when your brushes and sponges come into regular contact with your skin. Knowing how to clean makeup brushes and sponges helps remove product buildup and other residue while supporting better makeup hygiene. After all, if you’re already taking care of your skin, it makes sense to keep the tools that touch it clean too.
Read: Step-by-step makeup guide for beginners.
Or
Read: Beginner’s guide to build your first makeup kit.
FAQs
1. Can dirty makeup brushes cause acne?
Dirty brushes can contribute to breakouts, but they aren’t necessarily the sole cause. Brushes can accumulate makeup residue, oil, and microorganisms that may be transferred back to your skin, so regular cleaning helps reduce buildup and supports better makeup hygiene.
2. Can you clean makeup brushes with soap and water?
Yes, you can clean makeup brushes with soap and water, as long as the soap is gentle and you rinse the bristles thoroughly. You don’t necessarily need a dedicated brush cleaner for regular washing.
3. Can you use shampoo to clean makeup brushes?
Yes, a gentle shampoo (like baby shampoo) can be used to clean makeup brushes, especially when you don’t have a dedicated brush cleanser. Choose a mild formula, work it gently through the bristles, and rinse thoroughly to remove all product and shampoo residue.
4. Can you use dish soap to clean makeup brushes?
Yes, dish soap can clean makeup brushes, particularly when they have heavy or greasy product buildup, but choose a mild formula and rinse thoroughly. For frequent washing or delicate natural-hair brushes, a gentle shampoo or brush cleanser may be a better choice to avoid unnecessary dryness or damage.
5. Can you share makeup brushes?
It’s best to keep makeup brushes personal, especially those used around the eyes and lips. Sharing can transfer makeup residue, oil, and microorganisms between people, so a brush that looks clean isn’t necessarily clean enough to share.
Found this article helpful? Share it with someone you care about.
Stay radiant! Catch you in the next article.
Continue Reading

Fall Skincare Routine for Glowing Skin: How to Keep Your Skin Hydrated
A practical fall skincare routine guide to building a routine for glowing skin, covering how…
How to Clean Makeup Brushes and Sponges: A Complete Guide 2026
A practical beginner’s guide to ‘how to clean makeup brushes and sponges,’ covering the right…

Why Does My Makeup Look Cakey, Patchy, Dry, or Separated? Here’s How To Avoid Cakey Makeup and Make Foundation Look Smooth
A complete makeup guide to ‘why does my makeup look cakey, ‘ breaking down common causes…

How To Apply Makeup Step-by-Step for Beginners | Beginner Makeup Guide 2026
A beginner’s makeup guide showing how to apply makeup step-by-step for beginners, with the right…

Makeup for Beginners: The Ultimate Guide To Building Your First Makeup Kit
The makeup for beginners guide explains which products you actually need, how to choose formulas…

10 Foods for Clear Skin: A Science-Backed Guide to Healthier, Glowing Skin
A science-backed guide to 10 foods for clear skin, exploring how the right nutrients can…
Explore Our Categories
Skincare Insights

Discover the science behind healthy skin with science-backed insights on skincare ingredients, routines, and skin health.
Beauty Inside-out
.png)
Understand how nutrition, lifestyle, and wellness support healthy skin, stronger hair, and beauty from within.
Makeup Guide

Practical makeup guidance to help you choose products, improve application, and use cosmetics safely with confidence.
Pingback: How To Apply Makeup Step-by-Step For Beginners | Beginner Makeup Guide 2026
Pingback: Makeup For Beginners: The Ultimate Guide To Building Your First Makeup Kit